 Today we are announcing our new eForms library (not much to look at, yet) which allows our Forms2Base Pro and Litecustomers to share and download eForms. We thought this would be a great way to let folks get a jumpstart on using Tablet PCs and eForms, and also show off all the great forms they’ve created. Users will be able to search and sort forms by industry and topic.
The holidays are coming a bit early – As a way to help ‘stock’ our new library, we have decided to provide an incentive for people to upload forms: We will give anyone who creates and uploads a form a FREE copy of Forms2Base Pro (Retail value $499)! So download your free forms designer software, and get going – you have until January 31, 2007.
Please see the official details below. I can’t wait to see all the great submissions I know we’ll get!
Get a FREE copy of Forms2Base Pro!
Submit a Form to the new eForms Library
Want to earn a free copy of Forms2Base Pro (retail value of $499)? Simply submit a form to our eForms library by January 31, 2007 and you will get one free copy of Forms2Base Pro. Submitted forms are made available to the Forms2Base user community at http://eformslibrary.com/.
Forms2Base has established an eForms library where Forms2Base users can download already designed forms for immediate use in their Forms2Base application. Forms will be organized by industry and topic, and will consist of both Forms2Base Lite and Forms2Base Pro forms. All forms in the eForms library are FREE for users to download and use. Any downloaded eForm can be modified as necessary to support a user’s specific needs.
Help us build our library and get a free copy of Forms2Base Pro!
How to participate?
If not already using our Forms Designer software, download it FREE it at http://www.forms2base.com/download.html and design your forms.
Send an email to support@forms2base.com and attach your designed eForm to be included in the library. Remember: Any form submitted to the library is immediately available to others for their use. All submitted forms will be made available at http://eformslibrary.com/.
After acceptance of your form you will be contacted via email with instructions for activating your free copy of Forms2Base Pro.
For a form to be accepted into the library, and to receive a free copy of Forms2Base it must meet the following simple criteria:
1) Form must be a complete, usable form that will provide value to others
2) Form must not contain any logos, proprietary information, or other material that may infringe on a copyright or trademark.
3) User understands that upon form submission, they are providing Field2Base, Inc a non-exclusive right to distribute the form via www.eFormsLibrary.com
4) Form may not duplicate an existing form in the library
5) Limit one free copy per user
Any questions on this promotion or with on the Forms2Base eForms library may be sent to support@forms2base.com.
 publicly released Beta 2 today! This release is much faster, and has many new features – Including Desktop Search! WooHoo!
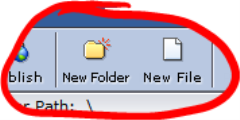
 Tab , and then New Folder